"This isn't real" 초실사 릴 — 프롬프트 공식 뽑아서 직접 재현해봤다
인스타를 넘기다 보면 이런 릴이 있습니다. 화면 가득 남자 얼굴 클로즈업, 그 위에 "This isn't real". 이어서 이마 피부가 화면을 꽉 채우는 매크로 컷 — 모공, 주름, 잔털까지 다 보이는데 이게 전부 AI 생성이라는 거죠. 마지막엔 검은 코드 박스에 JSON 프롬프트를 스르륵 보여주고 "Comment 'Prompt'"로 끝. 댓글 수천 개가 달립니다.
이 글은 그 릴을 뜯어서 프롬프트 공식을 뽑아내고, 실제로 되는지 제 PC에서 재현까지 해본 기록입니다. 복붙해서 바로 쓸 수 있게 정리했어요.
릴 구조부터 — 32초의 공식
원본 릴의 타임라인은 정확히 이렇게 굴러갑니다.
| 구간 | 화면 | 역할 |
|---|---|---|
| 0–4초 | 인물 정면 클로즈업 + "This isn't real" | 훅. 진짜 사람처럼 보이는데 아니라고 선언 |
| 4–8초 | 이마 피부 초접사 (모공·주름) | 증거 제시. "봐라, 이 디테일도 AI다" |
| 8–16초 | 다른 인물 클로즈업 | 반복으로 신뢰 쌓기 |
| 16–24초 | "PROMPT" + JSON 코드 스크롤 | 페이오프. 근데 스크롤이 빨라서 못 읽음 |
| 24–32초 | 또 다른 인물 + "Comment 'Prompt'" | CTA. 못 읽었으니 댓글 달게 됨 |
프롬프트를 보여주긴 하는데 읽을 수 없는 속도로 보여주는 게 포인트입니다. 댓글 유도 장치죠. 저는 프레임 단위로 캡처해서 다 읽었으니, 여기서 공식만 가져가면 됩니다.
왜 진짜처럼 보이나 — 답은 '결점'
원본 릴의 프롬프트를 프레임 캡처로 뜯어보면, 잘생기게 만드는 문장이 하나도 없습니다. 전부 결점을 지시하는 문장이에요. 모공, 잔주름, 흉터 조직, 번진 타투 잉크, 눈썹 사이 빈 자리 같은 것들.
AI 이미지가 가짜 티 나는 이유는 피부가 너무 매끈해서입니다. 그래서 이 공식은 반대로 갑니다. 프롬프트의 대부분을 "피부가 어떻게 불완전한가"에 쓰는 거예요. 원본 프롬프트에서 뽑은 핵심 원칙 4개:
- 매크로 선언 — "extreme macro photograph", "dermatological resolution(피부과 해상도)" 같은 표현으로 카메라를 피부에 들이댄다고 선언합니다. 매크로 컷이 있어야 "AI인데 이 디테일?"이 성립해요.
- 조직 수준 묘사 — "잉크가 표피 아래에 있다", "흉터엔 모공이 없다, 모낭이 파괴됐으니까"처럼 왜 그렇게 보이는지 이유까지 씁니다. 모델이 아는 해부학 지식을 끌어내는 거예요.
- 불완전함 명시 — 기계처럼 완벽하지 않아야 진짜다. 손으로 새긴 타투의 삐뚤한 선, 세월에 번진 잉크처럼 "완벽하지 않은 상태"를 직접 지시합니다.
- JSON 구조 — priority(뭐가 1순위인지) → subject → attributes(속성별 상세)로 계층을 나눕니다. 긴 산문 프롬프트보다 우선순위가 안 섞입니다.
복붙 프롬프트 — 매크로 피부 컷 (nano-banana 계열)
위 원칙으로 제가 다시 쓴 버전입니다. Gemini(nano-banana) 같은 JSON 잘 먹는 모델에 그대로 붙여넣으면 됩니다. [ ] 부분만 바꾸세요.
{
  "task": "generate_image",
  "priority": {
    "primary": "extreme macro photograph of [human forehead skin], dermatological resolution",
    "secondary": "the frame is filled edge-to-edge with living skin tissue - this is a texture study, not a portrait"
  },
  "subject": {
    "main": "[forehead of a man in his 30s]",
    "attributes": {
      "pores": "visible pores and hair follicles across the entire surface, denser in the T-zone, each one a tiny depression with natural oil sheen",
      "wrinkles": "fine horizontal expression lines that deepen and fan out naturally - not drawn on, but formed by years of muscle movement under the skin",
      "vellus_hair": "tiny colorless vellus hairs catching the light at grazing angles, invisible head-on, visible at the silhouette",
      "imperfections": "one or two small marks a dermatologist would notice - an old acne scar, slight uneven pigmentation. perfection reads as fake; the flaws are the realism",
      "lighting": "soft diffused window light from one side, so every pore casts a micro-shadow"
    }
  }
}
바꿔 쓸 수 있는 조합:
forehead→eye region(홍채 섬유 + 아랫눈꺼풀 물기 + 속눈썹 한 올씩)forehead→neck with a hand-poked tattoo(잉크가 표피 아래 번진 디테일 — 원본 릴이 쓴 소재)forehead→linen jacket collar with a horn button(사람 말고 옷감 짜임도 같은 공식이 먹힘)
실제로 되나? 로컬 ComfyUI로 재현
공식만 옮기면 반쪽짜리니까, 제 PC(RTX 4090 + ComfyUI + RedCraft 체크포인트)에서 같은 공식으로 직접 뽑아봤습니다. 원본 릴은 실존 유명인 얼굴을 생성했는데 — 그건 딥페이크라 따라 하면 안 되는 부분이고, 가상 인물로도 공식은 똑같이 성립합니다. 아래 4컷 전부 AI 생성입니다.
컷 1 — 포트레이트 (훅 컷)
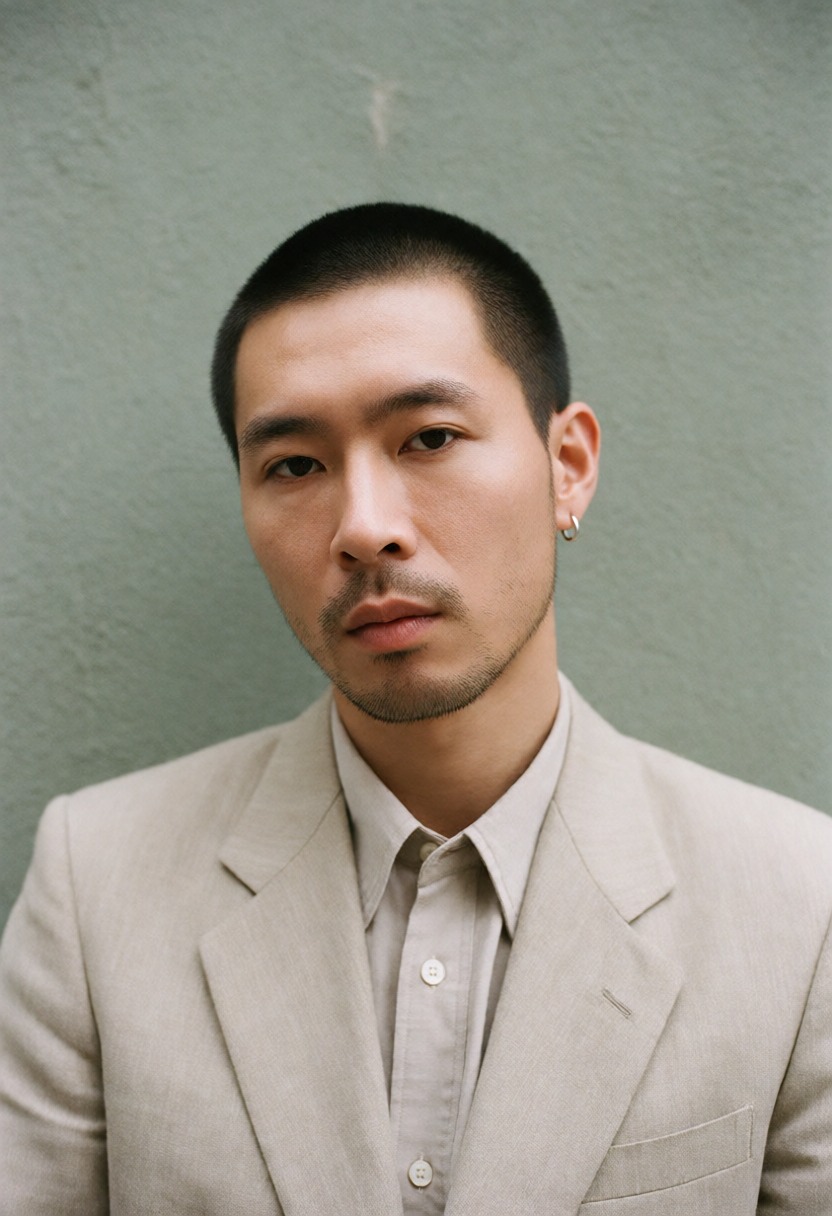
원본 릴의 비주얼 시그니처를 그대로 썼습니다: 90년대 다큐 필름 룩, 세이지그린 회벽, 베이지 리넨 수트, 무표정 정면 응시.
medium close-up portrait of a fictional Korean man in his mid 30s, very short buzz cut hair,
sparse stubble beard, calm deadpan expression, looking directly into the camera lens,
wearing a beige linen suit jacket over a matching beige shirt buttoned to the collar,
small silver hoop earring, standing in front of a muted sage green plaster wall,
1990s documentary film photograph, shot on 35mm Kodak film stock, fine film grain,
muted earthy desaturated color grade, soft diffused overcast window light,
shallow depth of field, hyperrealistic unretouched skin texture with visible pores
컷 2 — 이마 매크로 (증거 컷)
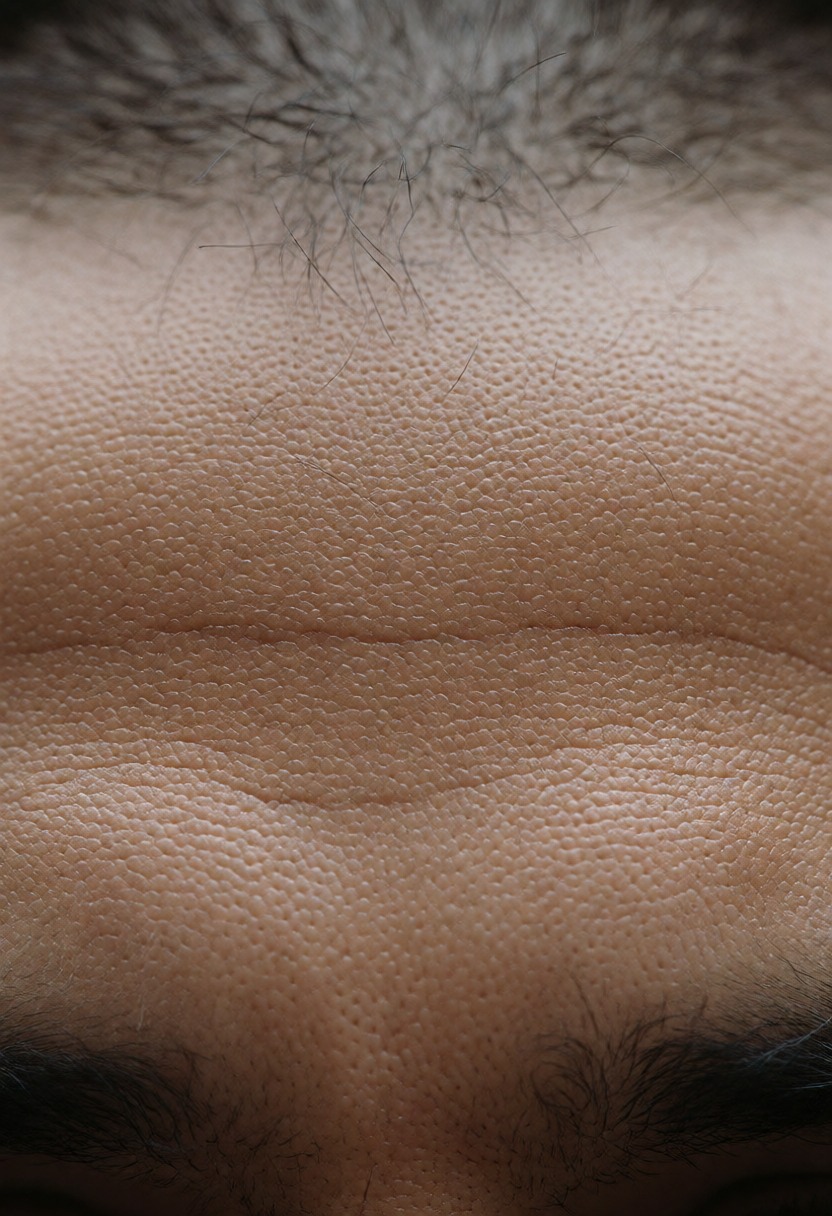
extreme macro photograph of a man's forehead skin filling the entire frame at
dermatological resolution, visible pores and hair follicles, fine horizontal
expression wrinkles, tiny vellus hairs catching soft light, natural oil sheen on skin,
buzz cut hairline at the top edge of frame, dark eyebrows entering the bottom edge
컷 3 — 눈 매크로
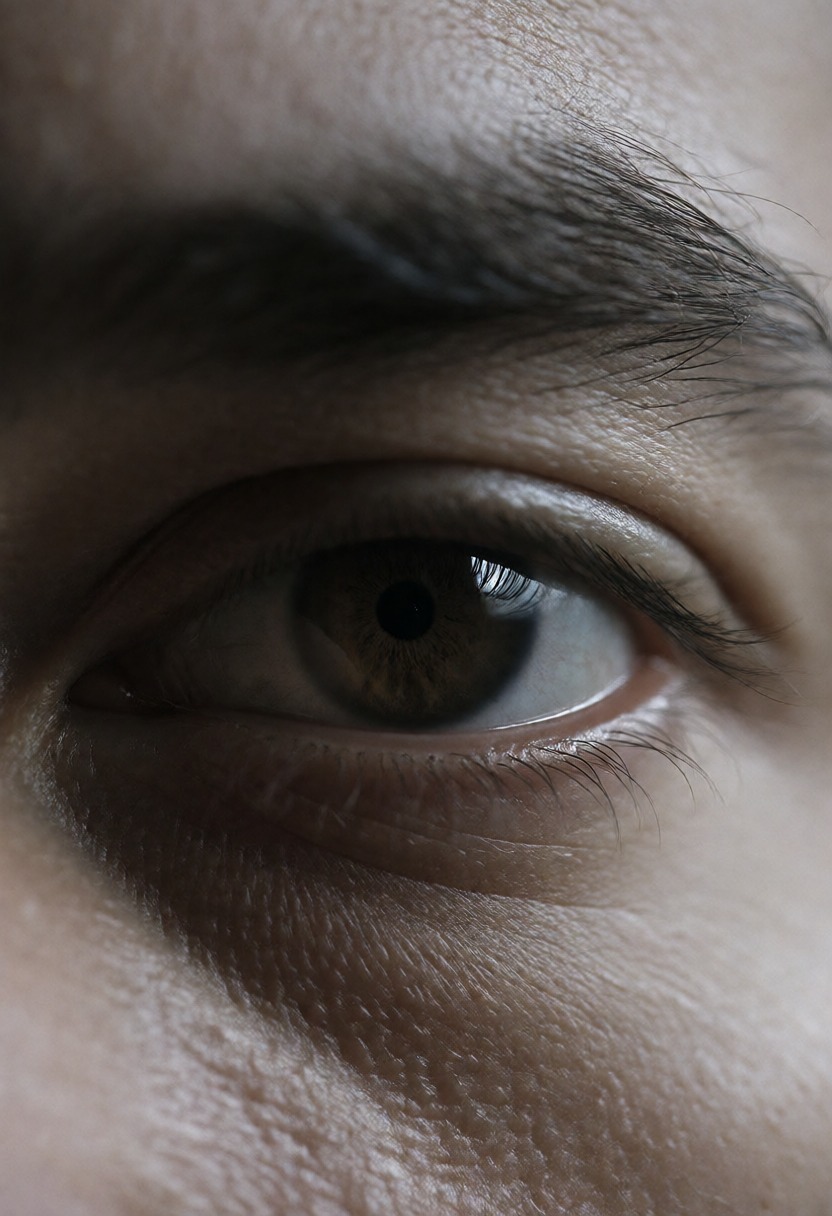
extreme macro photograph of a man's eye in dramatic low-key lighting, dark brown iris
with visible radial fibers and a tiny window reflection catchlight, moist waterline on
the lower eyelid, individual eyelashes, textured skin with pores and fine wrinkles
under the eye, moody shadow falling across the face
컷 4 — 단추 매크로 (사물도 같은 공식)
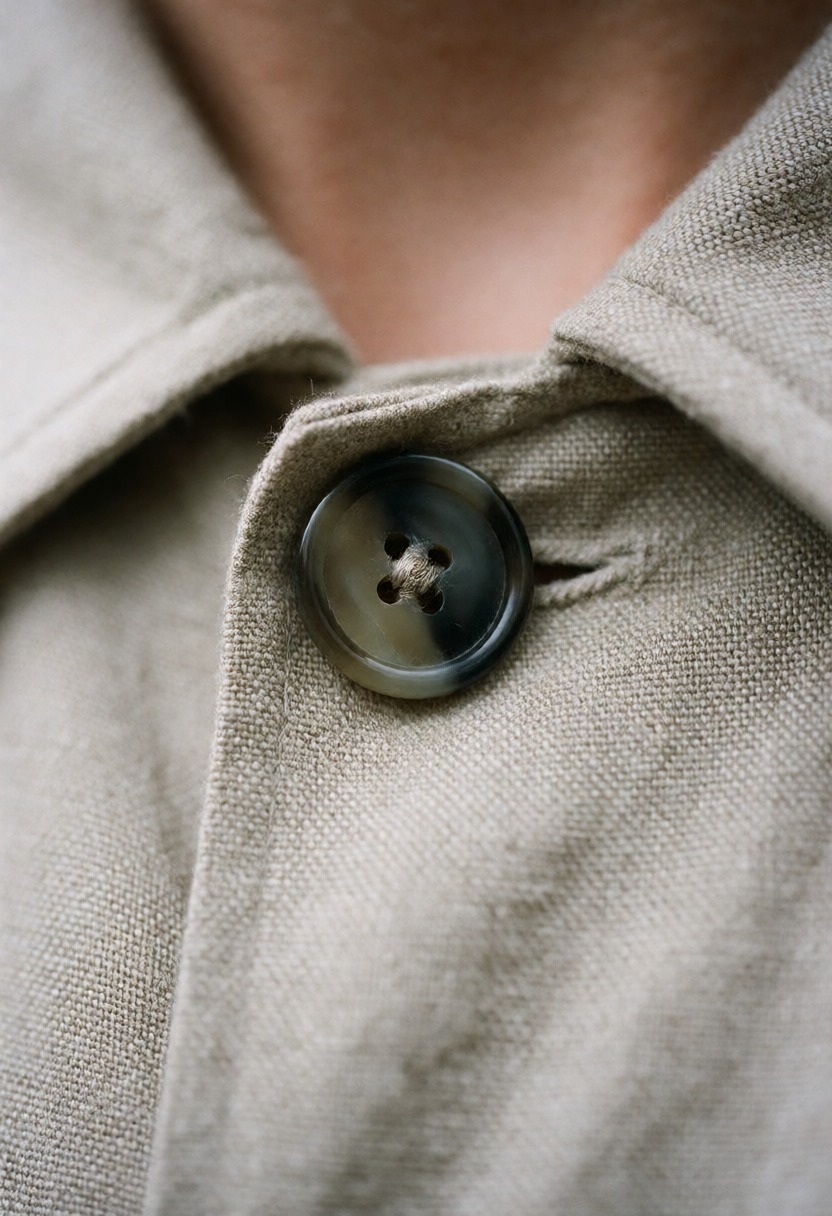
extreme macro photograph of a dark horn button sewn onto a beige linen jacket collar,
individual linen threads and fabric weave clearly visible, slightly frayed fiber edges,
four thread holes in the button, soft natural light, the rest of the garment out of focus
ComfyUI 세팅은 Krea2 계열(RedCraft int8) 기준 8스텝, cfg 1, euler/simple, 832×1216. 네거티브 프롬프트 없이 이 정도가 나옵니다. ComfyUI가 처음이면 설치 글부터 보세요.
릴로 조립하기
컷이 모이면 조립은 단순합니다.
- 포트레이트 → 매크로 → 포트레이트 → 매크로 순서로 4~6컷. 매크로가 껴야 "이게 AI라고?"가 나옵니다.
- 첫 컷에 "This isn't real" 같은 훅 텍스트, 중반에 프롬프트 화면(스크린샷이면 충분), 마지막에 CTA.
- 정지 이미지에 살짝 줌인/줌아웃만 걸어도 릴 텐션은 나옵니다. 이미지→영상 모델(Wan 2.2 등)로 눈 깜빡임 정도 미세 모션을 넣으면 한 단계 더 올라가고요.
하나만 지키세요. 실존 인물 얼굴로는 하지 마세요. 원본 릴이 조회수를 끈 이유 중 하나가 유명인 얼굴인데, 그건 초상권 침해고 계정 날아가는 지름길입니다. 위에서 봤듯 가상 인물로도 임팩트는 그대로 나옵니다.